Building a gun room and gun walls has become very popular in America. There are many reasons to consider a gun room.
- If you have a large collection, safes and cabinets may not work well for you.
- Security can be easier with a properly constructed gun room with a vault door.
- Rifle displays look great in the ultimate man cave
The purpose of this article is to give you a solid understanding of the gun storage system and how to best optimize space in your room.
https://www.youtube.com/watch?v=8j5a51h86uQ
What You’ll need:
- SecureIt CradleGrid panels
- 2 x 4s
- Plywood
- Level
- Measuring Tape
- Drywall Screws
- Screw gun
Time:
- 1-2 Days
- 2 people – for system layout and installation. Custom Woodwork or cabinets will add to the time.
Initial Planning
What is the purpose of the room or wall? There are unlimited possibilities with the CradleGrid system: High-density mass gun storage? Show and display? Storage and gun maintenance? Reloading? Most likely your project will be a combination of some or all of these.
You can custom design a gun wall or gun room to meet your exact needs. Also, consider SecureIt pre-configured gun wall kits. These are complete systems that are ready to install.
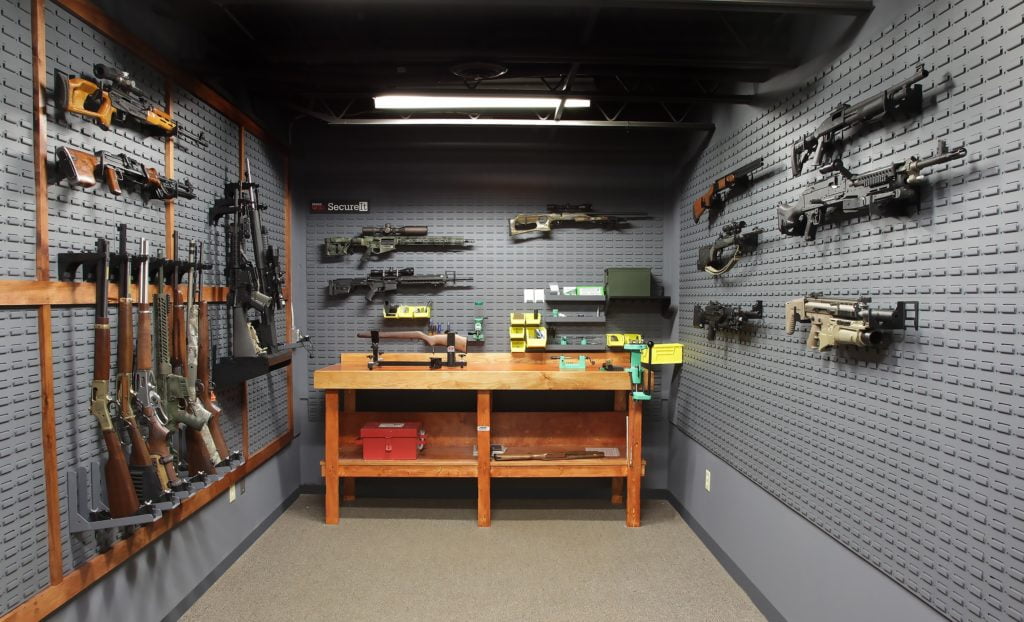
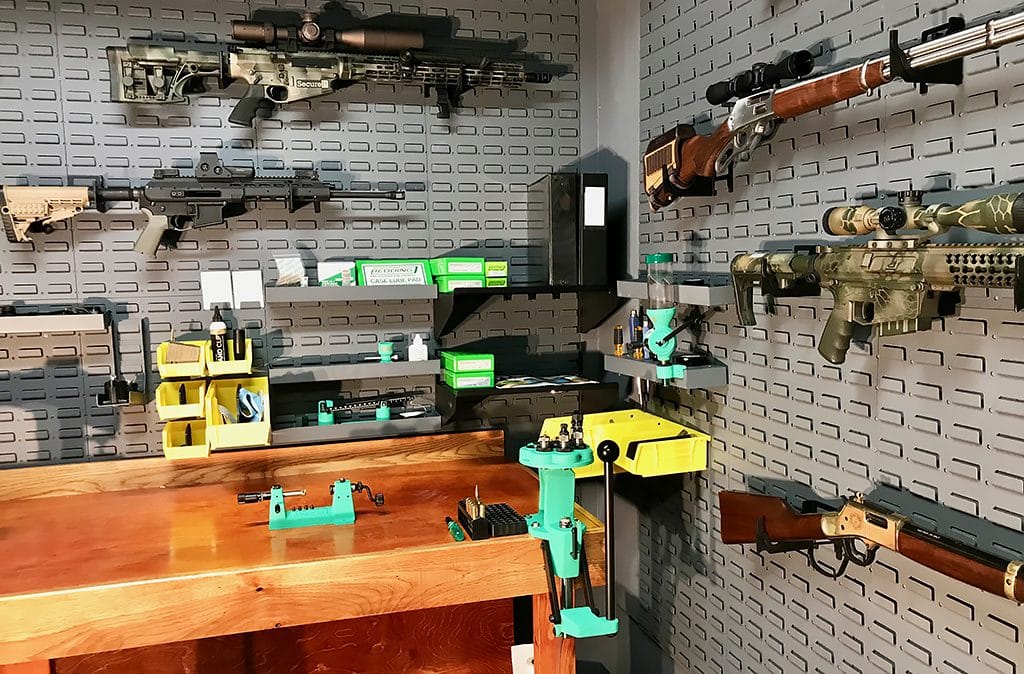
Gun Room Sample Images
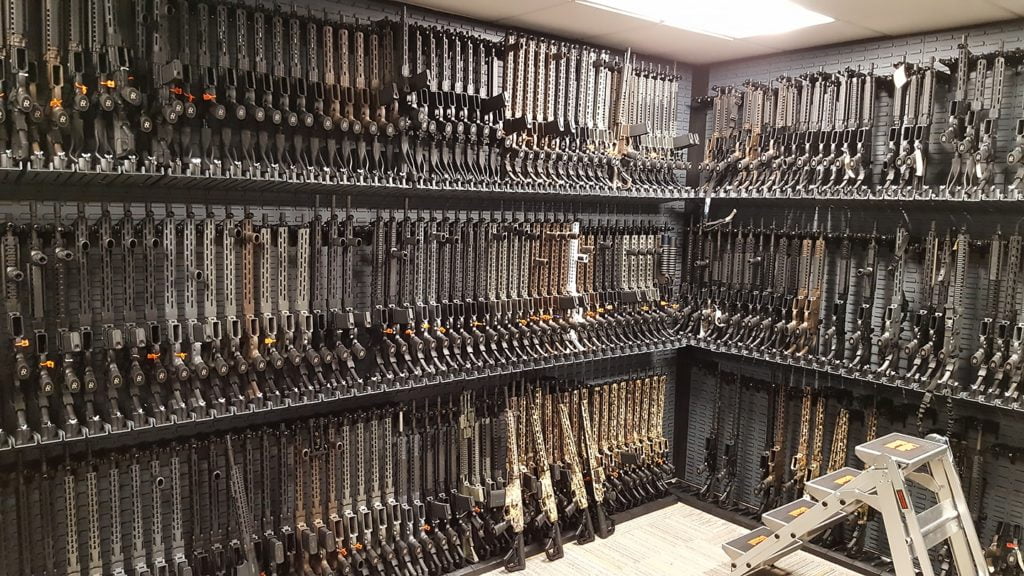
Daniel Defense high density armory
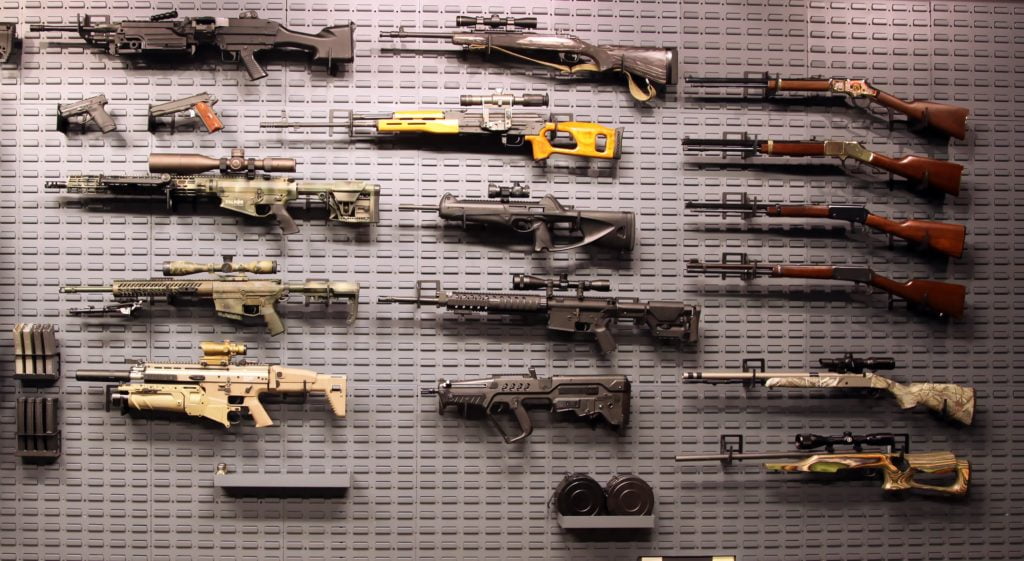
Gun display wall
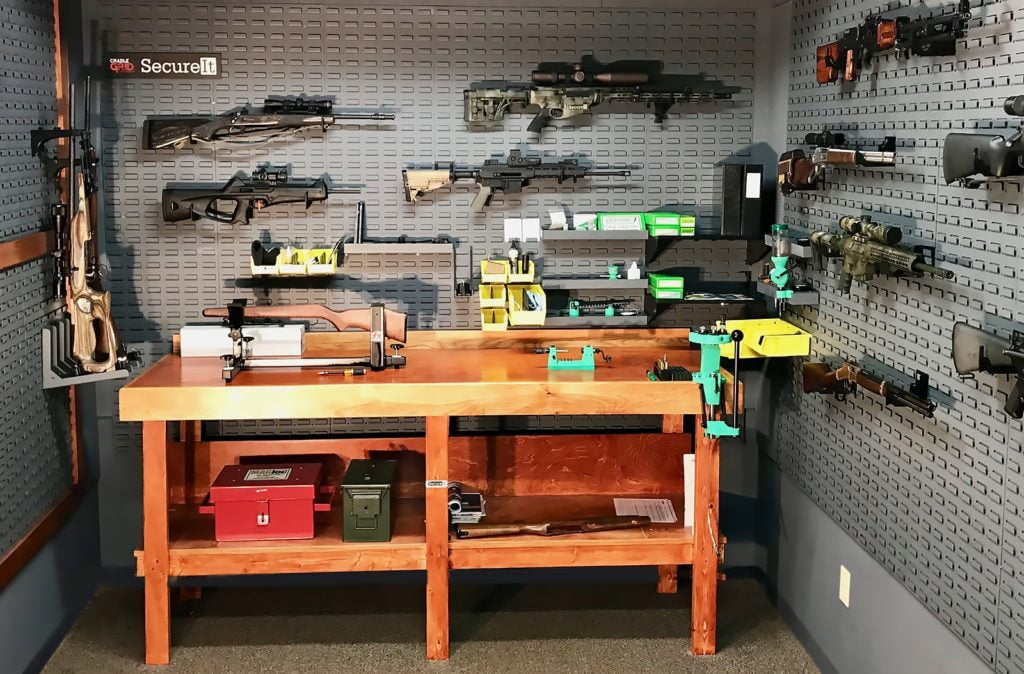
Gun work bench and reloading area
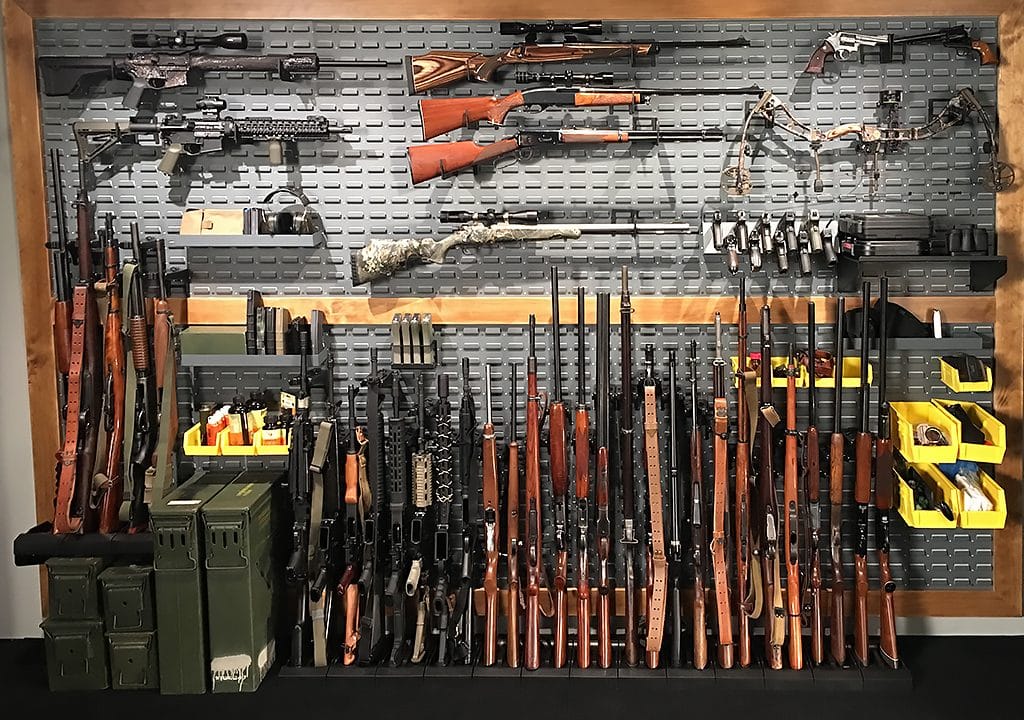
guns and gear storage and display
Gun Room / Gun Wall Considerations:
Space:
For estimating space requirements the general rule of thumb is 12 vertical rifles per row every 36″ of linear wall space. For horizontal displays, estimate 4 rifles for every square yard. When storing rifles vertically the length of the rifles will determine the vertical space required. We will go into more detail below.
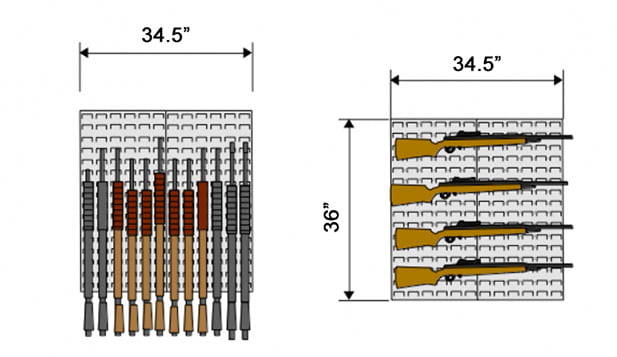
Vertical storage – How to store the second row.
When storing rifles vertically, there are 2 ways to hold the second row: using our 6 rifle stock shelf or using individual rifle shelves.
Rifles on 6 capacity rifle shelves VS Rifles on single stock shelves
6 capacity rifle
6 capacity rifle shelf
Supports rifles using stock bases
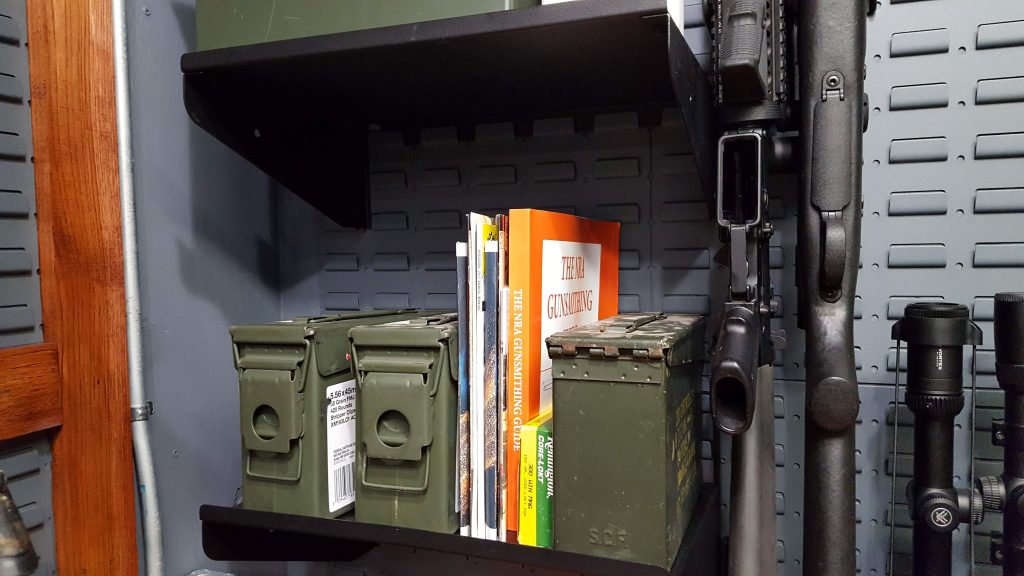
Shelves also hold books, ammo and gear
6 capacity rifle shelves fit anywhere on the system. The stock base supports sit on the shelf.
Single stock shelves

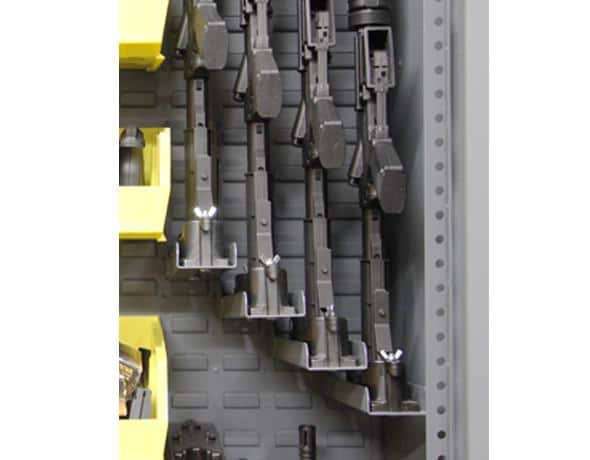
The single stock shelves work well when you have a wider variety of rifle lengths and you need maximum vertical efficiency.
Construction:
Are you using existing walls or are you building new?
Existing walls – Normal walls (studs and drywall) should be covered with 1/2″ or 3/4″ plywood.
If building a new you can substitute plywood for drywall. – depending on the wall layout and other items (doors, windows, electrical) it may be beneficial to build the wall with drywall then cover the area for the gun wall with plywood.
Construction Note
The louvered panels attach to the plywood via 1″ drywall screws. There are holes punched every 2″, normally you will use 6 screws for the 16″ panels and 8-10 for the 36″ panels. If there are shelves that are holding a lot of weight (for example: full ammo cases) you may want to add additional screws to support the load.
Planning and layout for a gun wall
How many panels will fit?
To determine the maximum number of panels that will fit use the formula: wall length in inches divided by 17.25 (the width of one panel)
Our room dimensions
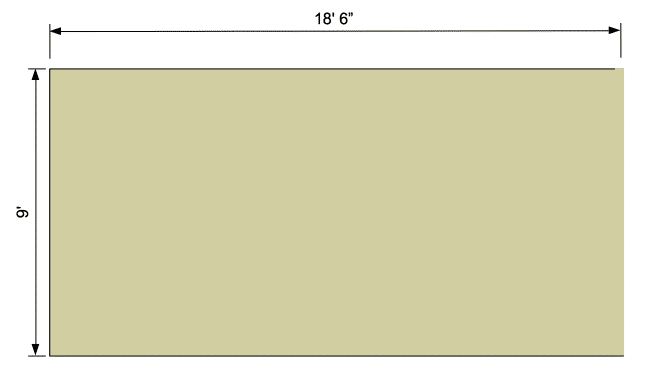
Above is a drawing of the room we will turn into an armory. The right side of the room is open. We will build a wall with a secure double door system.
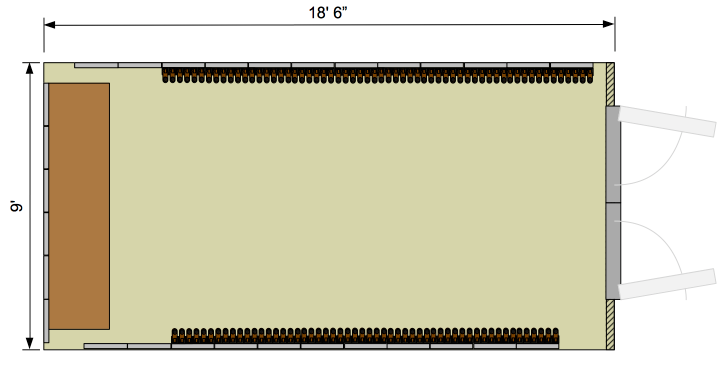
This is the room with the gun storage system, workbench, wall built and double doors drawn in
.
Let’s look at each wall:
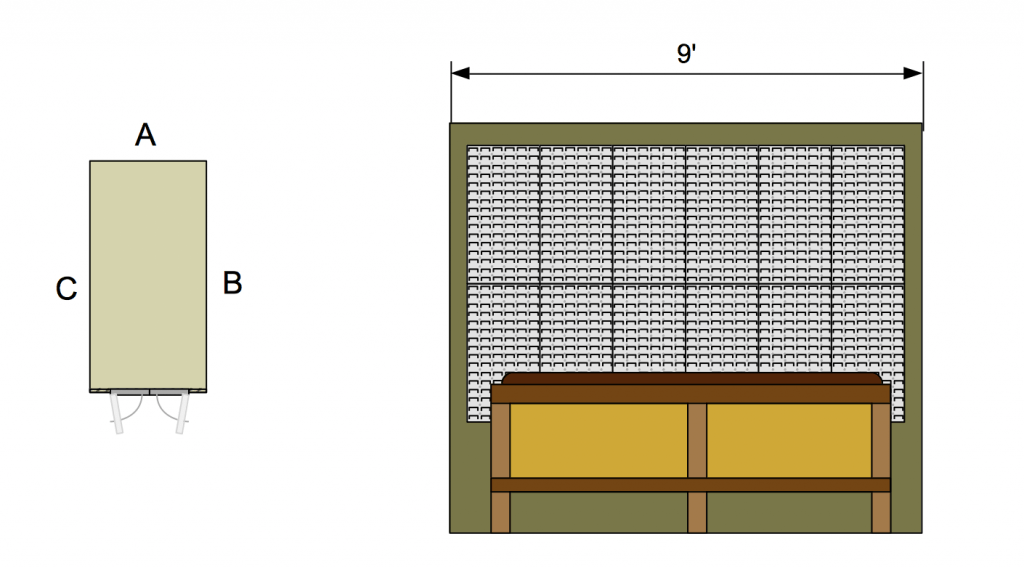
Here we have a small drawing with the walls labeled and the back wall “A”, this has grid panels and our workbench. To calculate to a number of panels: the wall is 9′ = 108″ each grid panel is 17.25″ wide so 108 divided by 17.25 = 6.26 we can fit 6 panels on the wall. these are centered and our workbench sits in front.
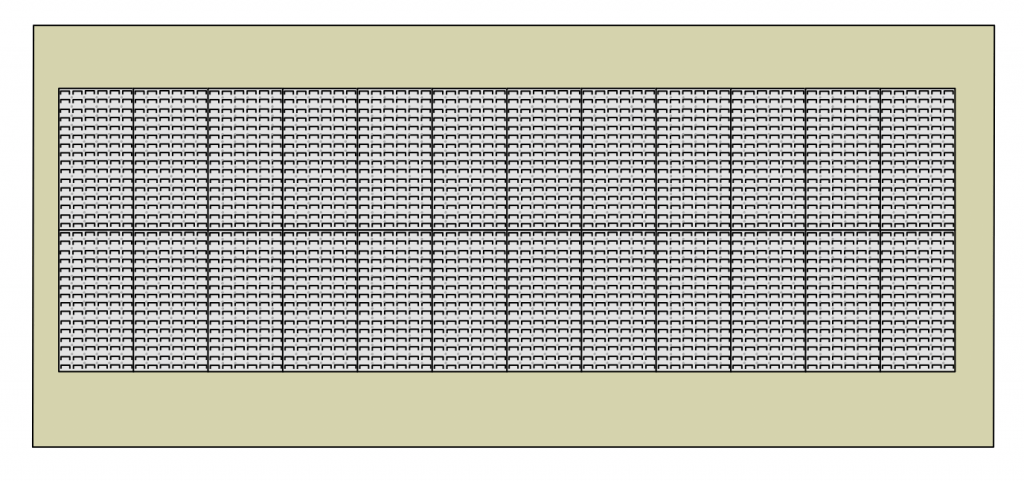
Wall “B” we use the same process here: wall – 18′ 6″ = 222″ — 222 / 17.25 = 12.86 so we use 12 panels.
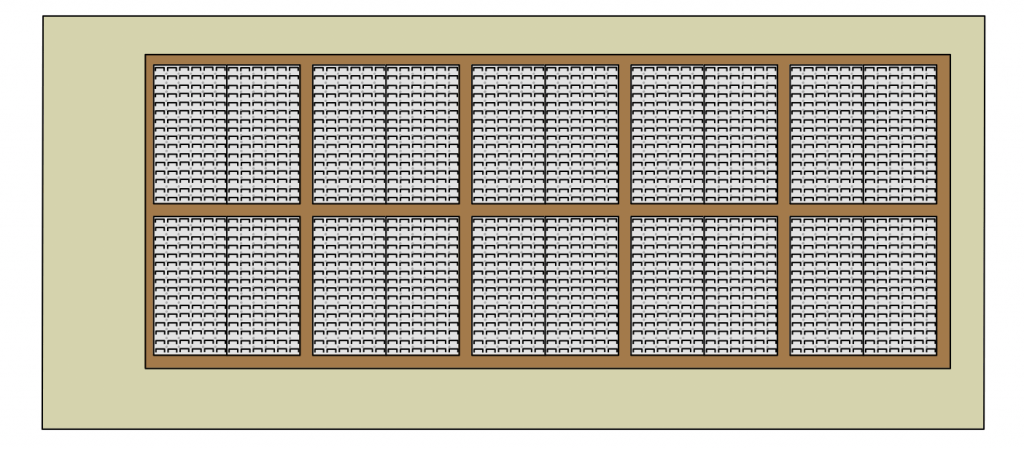
Wall “C” On this wall we are using hardwood between the panels. This gives the system a softer and warmer look. We installed the plywood, then used 1×4 hardwood to create the framework, then the panels were attached in the center sections.
Normally we would do all walls the same, however, we wanted to use this room as a showpiece for different styles and looks.
System Height
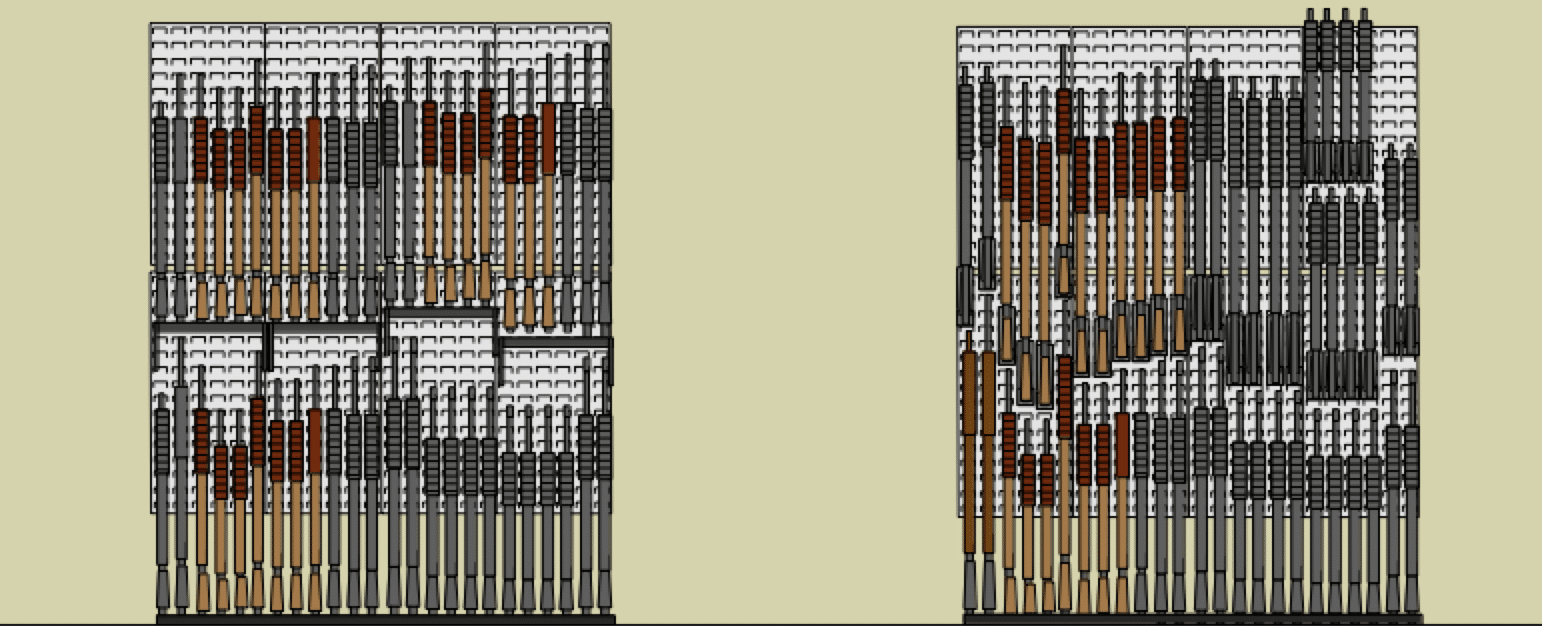
Determine what height is right for your wall. There are two lengths of panels, 16″ high and 36″. Two rows of the large panels fit most applications. This yields 6′ of vertical grid wall. In our room, we start the bottom panels 14″ off the floor. The bottom row of rifles sits on the Stock bases on the floor. 14: off puts to the top of the system at 86″ in a standard room with 8′ ceiling the results look good and work well. You can also start panels on the floor, use Two 36’s and one 16″ panel this will give you a total height of 88″. With this option, you will have the ability to use bins, shelves, and other accessories for the floor up.
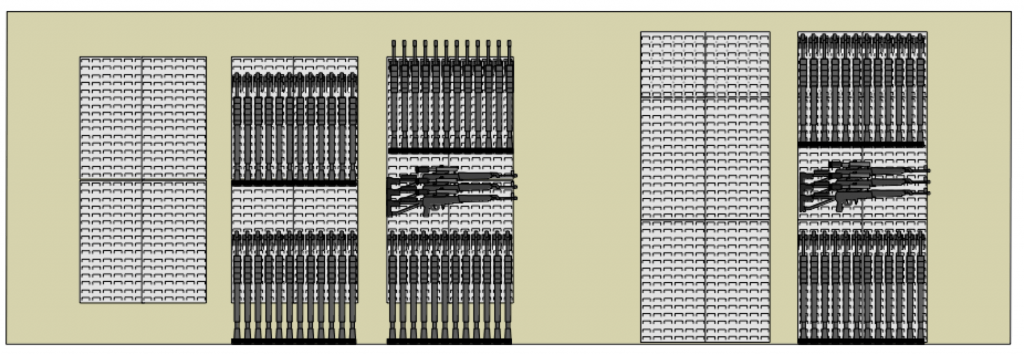
In the image above we show a 72″ high system 14″ off the floor. There are 24 rifles stored vertical and 3 horizontal. The rifle barrels at the top can be taller than the system. Next, we show floor to ceiling using 3 panels.
Option:
use 2 x 12 lumber or build a wood base on the floor for stock bases. This gets the rifles off the floor. Painting the wood Black or an accent color will give you a nice finished look.
Plywood
Plywood is placed over the drywall and painted (we recommend dark grey or black) so you can attach the panels. We use 1″ drywall screws to secure the panels to the plywood. The screws will go through the plywood and into the drywall. If you want to option to remove or move the gun storage system with minimal impact on the wall. Install the plywood with furring strips to give you enough space for the screw. This is also the method for installing a gun storage system into brick or concrete walls.
For brick or concrete walls use furring strips

Mounting the panels.
In a 2 panel high system, we start with the top panels. measure the height where you want the bottom. Snap a line where the bottom will be, make sure it is level. We normally will screw a temporary ledger board onto the plywood at the line so to support the panel during install. When installing screws into panels, make sure to center the screws in the holes. If a screw is off-center it can push the panel off the line as it is tightened. – quick fix: if a screw is off a bit, leave it loose until the other screws are seated then tighten this will keep the panels straight.
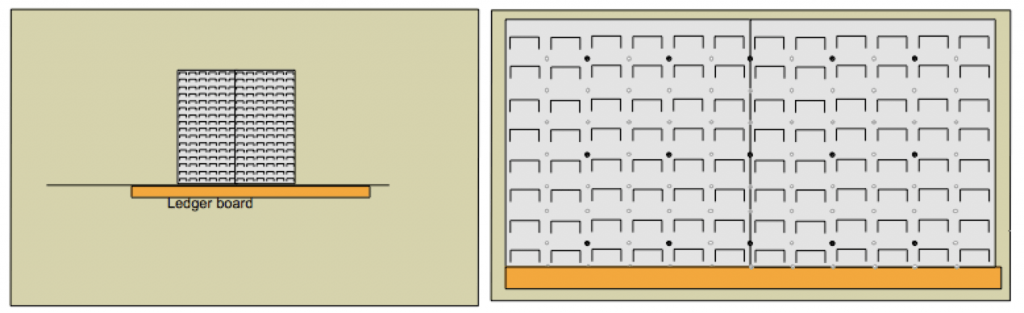
We install screws every 3 -4 louvers and every 2-3 rows. adding a few screws to the panel joints will keep things straight and clean.
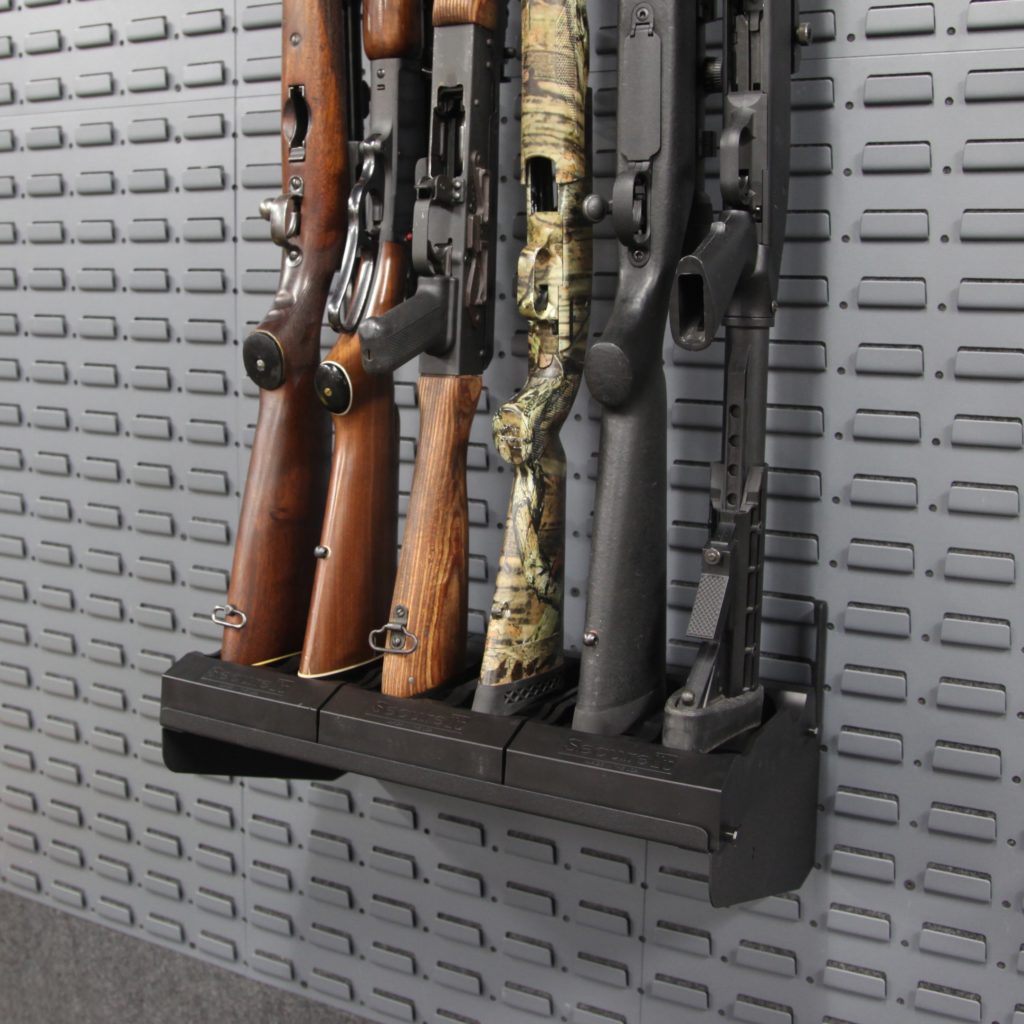
When the panels are installed you can start adding components and firearms. There are unlimited options as far as how you store things!
Gun Room Reloading bench
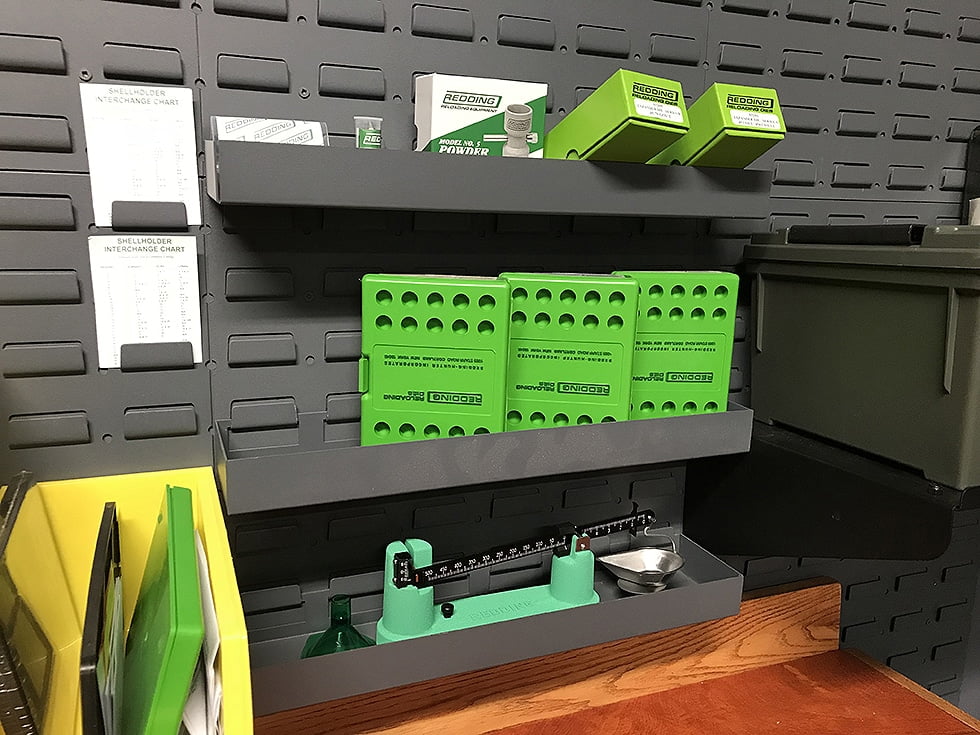
Reloading dyes stored in the gun room.
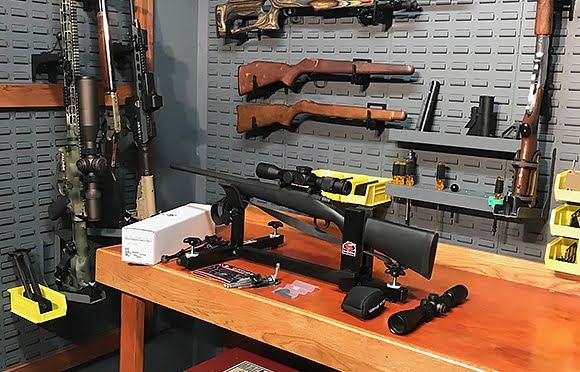
Gun Smith bench in a gun room
SecureIt Gun Room Overview:
shop GUN ROOM COMPONENTS
GUN WALL KITS
Gun Room Overview
https://www.youtube.com/watch?v=iCGElGNGYWM
Learn More: Modern Gun Storage

On the single riffle holders, why did you put the wing nuts up? Put those on the bottom side and less places to scratch a quality firearm.
You should substitute deck screws for dry wall screws. Dry wall screws are brittle and only good for dry wall. You will have the heads will snap off of some of them when driving them in. Deck screws are much stronger and will not break. I have made furniture and cabinets for nearly 50 years and learned this the hard way.
Great stuff! Can you share details of the reloading/gun smith bench?
I am building a separate structure for my firearms. And yes it will have a top notch alarm. I am impressed with your system. My walls will be lined with .25″ AR steel. My question is: What do you suggest for the door?
I intend to begin construction on a concrete-walled-floor and ceiling gun room in the next year. I will use some of your products. Thus, I would like to be kept on your mailing list, or email as shown below. The capability you have shown is remarkable and first class!! Congratulations.
What about moisture and is it better to store weapons in some kind of bag or just hanging on brackets?
When guns are properly cleaned and lightly oiled corrosion in a gun room or walk in vault is fairly low risk.
If you have high humidity, a dehumidifier will work. Using bags: I was involved with a larger project in the middle easy where corrosion and dust was a real threat. We used Velco and Ziplock bags made with VCI. VIC – “vapor corrosion inhibitor” is a product that is very effective in stopping corrosion.
There are several on the market. I have worked with Heritage Packaging, they make VCI gun bags that work well. I would not seal up a gun in a non VCI bag unless I was sure it was complete dry and the bag free of moisture.
Thank you for the kind words. Please do not hesitate to contact us when it come time to build. Our Armory design staff can assist with room drawings, layout ideas and technical assistance. I have added a video to the article that has a lot of detail.
I like doors that are not obvious but that can get fairly custom. Look at Creative Home Engineering. Vault Pro USA and Ft Knox make good traditional vault doors. There are a lot of choices out there. I do not like the big retail safe company doors. They spend so much money on advertising and marketing there doors are overpriced for what they are. They need to high margins of pay for all the advertising.
We made that using all the scraps from the room. I have added a video of our gun room build.